Harrington & Richardson Model 922 BruceVarner.com


Harrington & Richardson Model 922 (Pre-1940)
4th Variation (Birds Head)
Internal Function (Final Page)
--.22 Caliber, 9 Shot Revolver--
If you have not been to page 1 of this article, please click here. This is the final page of the information on the interaction and functioning of the Harrington & Richardson early (pre-1940) Model 922 4th variation revolver.
This pistol presented itself with several issues. It had been neglected for many years. Apparently kept in a humid environment, inside a leather holster. The metal was rusted and pitted in many places. Someone had it apart in the past and the friction pin was not even in the gun. There was no grip or grip screw. Mechanically, the cylinder turned freely. The cylinder rod looked like someone had beat it with a hammer. The revolver would not cock into single action. Timing was off. The hammer would fall slightly before the cylinder aligned with the barrel. I wanted to ensure that the pistol could be repaired before spending much time "conserving" the revolver. Here are the steps that I followed.
I performed
the following steps:
1) Disassembled
2) Cleaned / soaked
and did some light hand carding of the metal surfaces
3)
Straightened the cylinder pin
4) Machined the slave pins &
studied exactly how the pistol functions
5) Spent time not
believing that the cylinder stop/lock was not designed to really
prevent the cylinder from turning both direction when engaged
6) Purchased a repo single piece grip & adapted a screw to hold
the grip. Learned that the grip screw also holds tension
on the flat main spring
7) 1st reassembly:
-- Gun would
cock into single action but would not reliably hold
-- Timing
off. Lifter (Hand) worn
-- Simple action of setting the
gun down or just touching the cylinder can throw the cylinder
out of alignment with the barrel
8) Disassembled
9) Light Stoning of sear/hammer
engagment point (Ensure correct angle + enlarge notch in in
hammer to hold full cock)
10) Light polish of firing
mechanism pivot points
11) Slight peen of hand (lifter) tip to
the right
12) 2nd reassembly:
--- Single action / hammer
cocked on functioning correctly
--- Action smoother
---
Timing now correct
--- Cylinder rod still difficult to remove
--- Appeared shootable
Conservation Steps:
13) Disassemble
14)
Additional straightening & slight filing/smoothing of cylinder
pin
15)
Placed all metal parts into boiling water for 1 hour, then blow
dry (Rust turns to ferric oxide / black)
16) Card revolver,
parts, crevaces by carding + #0000 steel wool in tight areas (Removes carbon &
gunk)
17) Soak in karosene overnight
(Remove/displace all water) Dry
18) Oil
19) 3rd reassembly:
--- Testing
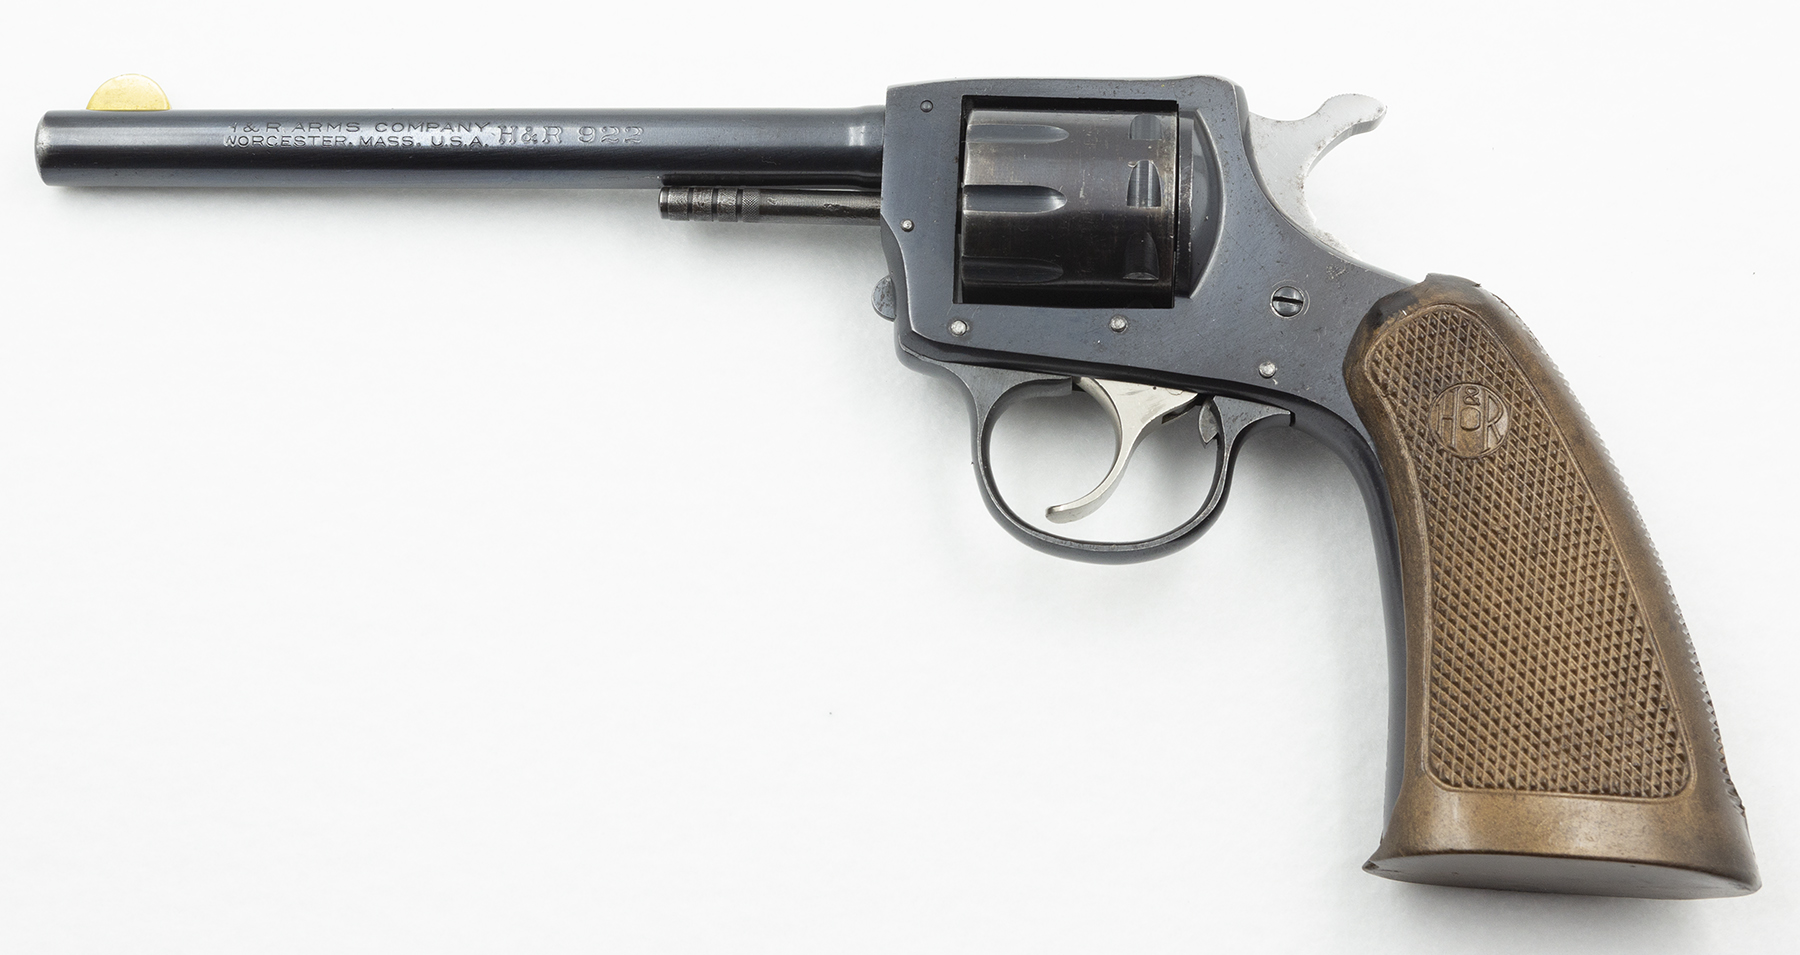
Here is the conserved and repaired revolver. The revolver
is not restored. Conservation involves bringing back any
existing bluing and removing rust only. Any pits and wear
remain. This type of conservation is less likely to
affect value of an old firearm. As you can see this
revolver is not of display quality. Deep pitting remains.
Howevever, considering the previous condition it is now an
acceptable shooter.
Image #10
Here are two images of different pistols. Left is a
free turning cylinders early model (Like the one in this article).
Right is a later model with 2-way cylinder stop machining.
The left design only stops cylinder from
over-rotating. The right design stops cylinder travel either
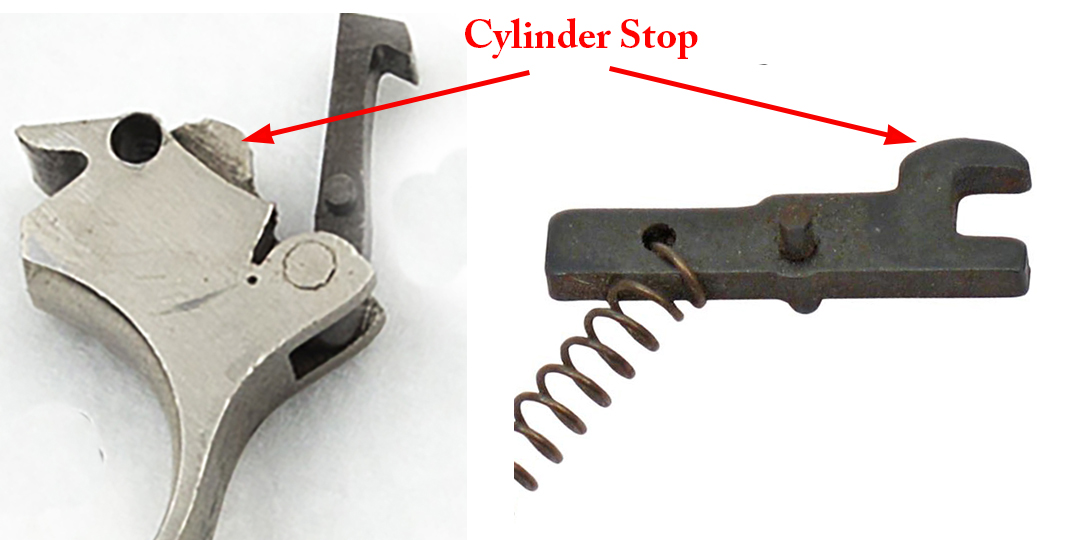
way when engaged. On left the cylinder stop is part of the
trigger. Therefore it only engages the cylinder just prior to
a complete pull of the trigger or when the hammer is cocked into
single action. On right the cylinder stop is a seperate part
and engages the cylinder all the time except when the trigger or
hammer begins to be pulled.
Back to Page 1 of Harrington &
Richardson Model 922 (Pre-1940) Revolver
Back to Page
2 of Harrington &
Richardson Model 922 (Pre-1940) Revolver
Image #11
(Free Turning Cylinder-Left, Locked Cylinder-Right)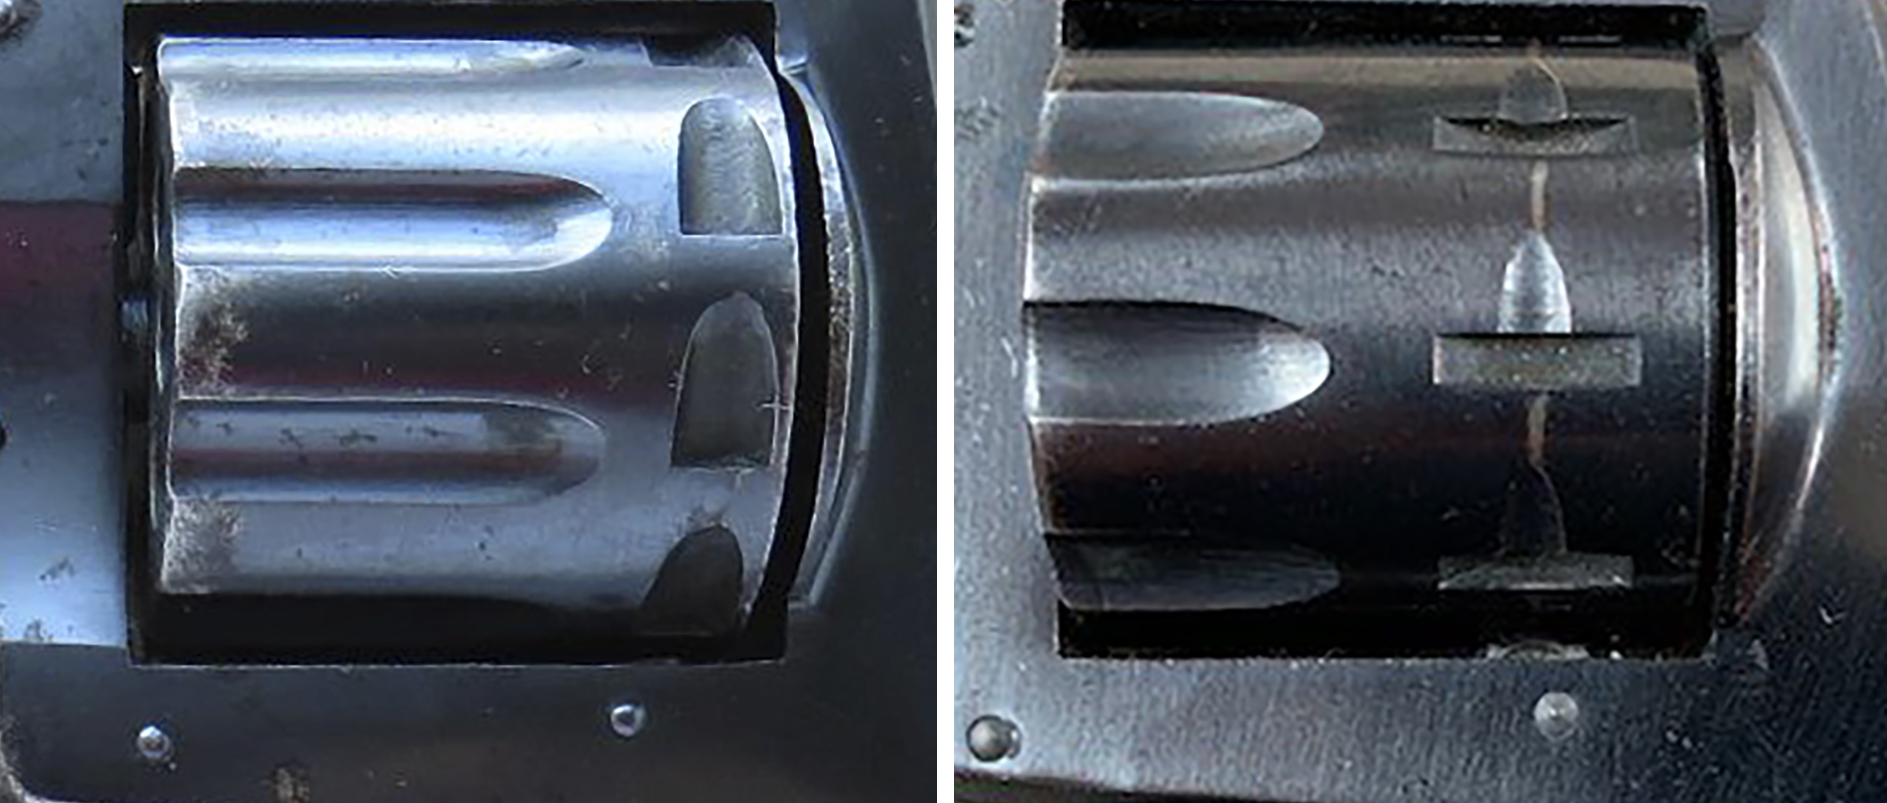
Image #12 (Part of trigger-left, seperate
part-right)